Admin Help Docs
Adding a New Help Doc
In the admin area of your site, navigate to Help Docs > Manage. Then click on the "Add New Help Document" button.
- Add a title for the doc. This is the subject or question for the help doc.
- In the main body of the post, include whatever you want that will be helpful for your admin area users. Note — not all types of content will show up in the various locations, so you'll have to give it a try and see if it works or not. If for whatever reason specific content does not show in a certain area that you would like it to, you can make a request for us to add support for it.
- You may add a description or leave it blank. This is only used to summarize the document for the "manage documents" list table. If left blank, it will show first couple of lines of the content similar to an excerpt.
- Location:
- Site Location: This is where the help doc will appear in your admin area.
- Main Documentation Page: This is where you would find all of the docs when you click on the Help Docs menu item, or by going to Help Docs > Documentation.
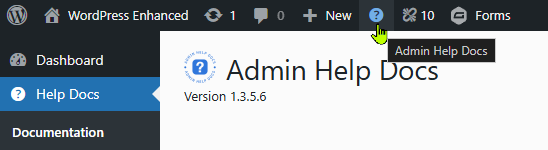
- Admin Bar Menu: If you have enabled the admin bar icon from Settings (see below), you can add the help doc to it as a submenu item. The submenu item will display as "Document Title — Document Content" with all html tags stripped out. If you just want to link the menu item to a page, paste only the URL in the content box without anything else.
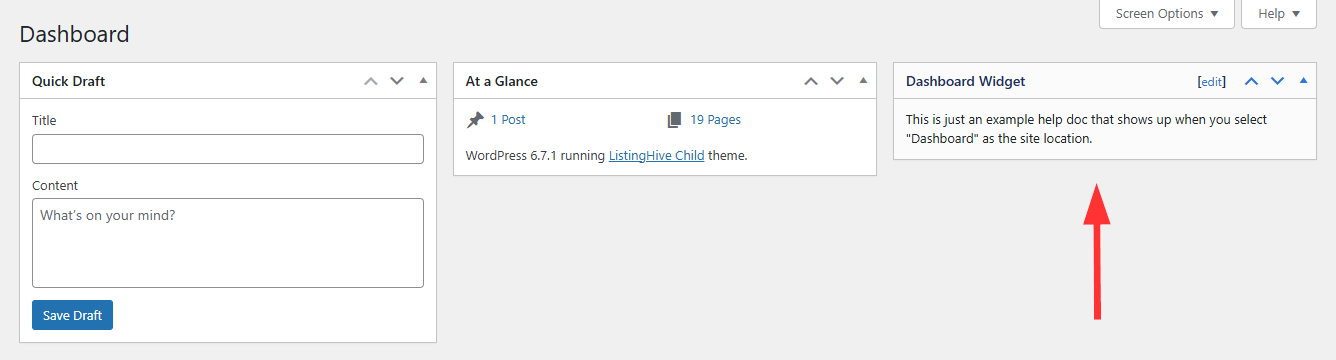
- Dashboard: Adds the help doc as its own widget to your WordPress dashboard.
- Post/Page Edit Screen: The screen where you edit posts, pages, and other custom post types. When selecting this, you will see a list of post types to apply the help doc to.
- Post/Page Admin List Screen: The screen that lists all of your posts, pages, and other custom post types. When selecting this, you will see a list of post types to apply the help doc to.
- Other items from your admin menu: You can add help docs to most pages in your admin area. Note — some pages added by plugins or themes will not work as expected due to how they are set up by their authors.
- Menu Order (only available when Main Documentation Page is selected): The position of the item in the Main Documentation Page menu. You can also change this order by simply dragging and dropping the items in the file tree on the left panel of the Main Documentation Page.
- Add to Dashboard Table of Contents (only available when Main Documentation Page is selected): If you have enabled the Dashboard TOC in Settings (see below), selecting this will add a link to the doc in the Table of Contents dashboard widget.
- Page Location (not available on Main Documentation Page, Admin Bar or Dashboard): Options are Contextual Help Tab, Top, Bottom, or Side (if on a post/page edit screen). The Contextual Help Tab appears at the very top right corner of the page if any help is available. Note — when adding to Contextual Help Tabs, formatting is limited to simple text.

When choosing Contextual Help Tab on Post/Page Edit Screens that use the Gutenberg editor, the Contextual Help Tab is moved to a Help button at the top right of the page in the toolbar.
- Allow Public: Allowing this document to be public adds it to a publicly accessible custom rest API end-point, which can then be pulled in from other sites you manage using the Import feature (see below). If enabled, make sure no sensitive information is included in your content.
- Site Location: This is where the help doc will appear in your admin area.
- You can also add the help doc to a folder, which is only used when the site location is set to Main Documentation Page.
Main Documentation Page
In the admin area of your site, navigate to Help Docs > Documentation, or simply click on the Help Docs parent menu item. If you have the admin bar icon enabled from Settings (see below), you can also click on that to get there.
- You can add a new doc by clicking on the "Add New" button. Be sure to set the Site Location to "Main Documentation Page" for it to show up here.
- When help docs are added to the Main Documentation Page, you will see a file tree on the left panel and the doc viewer on the right panel. The top-most positioned doc in the file tree will always load by default unless you set a specific one in the Settings (see below).
- You can drag and drop the position of the files in the file tree to reposition them.
- To add files to folders for better organization, navigate to Help Docs > Folders and create a new folder. Then return to the Main Documentation Page and drag the file into the folder. Alternatively, you can edit the help doc you want to put in a folder and add or select a folder from the edit screen.
How do I display a shortcode without executing it?
- You can use the
- Copied! - Important: make sure you use single-quotes in this shortcode so you can add double-quotes to the content value.
- Usage:
[[shortcode_name param="value" param2="value2"]]Content[[/shortcode_name]]- Copied! - Basically, replace the brackets with curly brackets and add the whole thing to the content parameter.
- Disable click-to-copy functionality with
click_to_copy='false'parameter. - You may use the optional
code='false'parameter.
How do I add custom CSS to documents?
- You can use the
- If you are embedding styles, it should be added to the top of the document above what you are styling.
- You cannot add a stylesheet and embed styles directly in the same shortcode.
- Custom CSS only works on the Main Documentation Page.
Imports
In order to import a help doc from another website, you have to make it publicly available on the original website, which you can do by editing the help doc and choosing Yes under the "Allow Public" option in the Location section. Once it is publicly available, go to the site in which you want to import it into and navigate to Help Docs > Imports.
- Click the "Add New Import" button.
- Add a title for your import (just for reference; this is not the title of the help doc).
- Under the Website URL section, type the website domain of the website it's coming from.
- You can optionally click on the "Preview RAW Data" button to check if there is data publicly available from the website. If nothing is available, this data would be empty.
- Save the import as a draft to populate the data.
- Under "Choose Documents to Import," you will see all of the available docs that are publicly available on the site you entered. You can choose to remotely feed documents from the other website, which will update automatically if they are changed on the other site. This is useful if you manage several sites and want to control them in one spot. You may also import them individually, which will clone them and add them to this website. The benefit of doing that is that you won't lose them if they get taken down on the other site. Note that if you import it, you will probably want to disable the local version or the remote feed so that you don't have two documents showing up at the same time.
- Be sure to select "Enable This Site" and publish the import.
Settings
In the admin area of your site, navigate to Help Docs > Settings.
- Enable Admin Bar Menu Quick Link: Adds a quick link icon to the admin toolbar at the top of the page. This makes it easy for people to quickly bounce to the Main Documentation Page located under Help Docs > Documentation. You may also add docs to this quick link by selecting "Admin Bar Menu" as the Site Location when setting up a help doc.
- Enable Dashboard TOC: Adds a dashboard widget with a table of contents for the docs on the Main Documentation Page. When enabled, choose "Add to Dashboard Table of Contents" in the Location section of the help doc.
- Menu Icon: You may change the default menu icon to any other Dashicon. Doing so will change the icon in the admin menu on the left as well as the icon in the admin bar if you have enabled it.
- Logo: You can also change the logo on all of the plugin pages so your client knows the help docs came from you. The preferred size of the image is 100x100 pixels. Accepted formats: jpg | jpeg | png | webp
- Page Title: This is the name of the plugin pages, which by default is "Admin Help Docs."
- Hide Version Number: This hides the version number underneath the page title. It is good to keep it here for reference if you need to contact support for any reason; however, some people find it a nuisance so we made it an option to remove it.
- Menu Title: This is what shows up in the left admin menu.
- Menu Position: Each item on the left admin menu is designated a position by number. If you want to place it above the dashboard, set this value to "1". If you want it directly under the dashboard, set it to "2". If you want it at the bottom, try setting it to "999". Plugins can set their own positions, so you'll have to play around with it a bit to get it in the right position.
- Left Footer Text: This allows you to change the text on the bottom left of every admin page. By default the text shows "Thank you for creating with WordPress." You can change this to anything you want, such as adding your contact information or a link to the Main Documentation Page. To add a link, you will need to use HTML. For example:
<span class="footer-thankyou">For help, go to <a href="/wp-admin/admin.php?page=admin-help-docs&tab=documentation">Help Docs</a> or call 555-555-5555.</span>
Note — if you use another plugin to customize your admin area, it may conflict with this feature. - Right Footer Text: Similar to the left footer text, this shows up on the bottom right of all admin pages. By default it shows the WordPress version. You can change this or add to it if you want. It is recommended to keep the version number and simply add to it so that it is still easy referenced when they contact you for support. Use the tag
{version}to display the version number - Capability Required to View Docs: This allows you to restrict viewing help docs to users with a certain capability. For instance, if you only want admins to see them, use
manage_optionsas the capability value. Or if you want to include help docs for all users that have access to the back area, including subscribers that can edit their profiles back there, you can usereadas the value. View a list of capabilities. - Additional Roles That Can Add/Edit Help Sections: By default only admins can add and edit help docs. You can select additional roles here.
- Allow Public by Default: Allowing documents to be public adds them to a publicly accessible custom rest API end-point, which can then be pulled in from other sites you manage. You can also set this on individual help docs as well. If you have documents that are sensitive, it is not recommended to make them public.
- Accent Color / Background Color / Document Title Color / Text Color / Link Color: You can change the colors of different aspects of the help docs. This gives you a little more control on theming your help docs to match your brand or make it more noticeable with bright colors. You cannot change colors on individual help docs as customers expect consistency with help documentation.
- Disable Curly Quotes: WordPress automatically converts straight quotes (
") to curly quotes (”) on posts, which makes sharing code difficult. Disable them if your help docs include code snippets so that people don't copy the wrong quote type. - Enable User Preferences: Adds options to user profiles for resetting preferences related to which columns are hidden in admin list tables, which meta boxes are hidden, and where meta boxes are positioned on edit pages. It's best to keep this disabled unless you need to clear them for someone. When people move meta boxes on posts and pages, the position you set on the help docs could be moved to a different area. This may or may not be important to you, but I found it helpful to clear my own when testing locations.
- Default Document on Main Docs Page: You can select a default document to load on the Main Documentation Page. Otherwise it will load the first doc on the list.
- Hide Document Meta on Main Docs Page: Hides the "created" and "last modified" dates and authors on the Main Documentation Page docs.
Resetting to Default Values
At the bottom of the Settings page, there are links to "Reset Colors to Default" or "Reset All Settings to Default".
Copying Settings from Another Site
- On both sites, at the bottom of the Settings page, click on the link that says "Copy Settings from Another Site".
- On the site you want to copy settings from, copy the settings link.
- On the site you want to copy settings to, paste the settings link in the field and click "Import Settings."