


Deadbolt — Restricted Page Templates
- Details
- Getting Started
- Changelog
Description
Most access plugins hide a page and show one generic "access denied" line. Deadbolt lets you decide who can view each page, post or custom post type, and then shows each blocked visitor a message written for them.
Visitors who cannot view something are sent to your No Access Page. There, the plugin picks the template that best matches the page they tried to open and the reason they were stopped, and fills it in with links to log in, register, log out or try again.
Who it's for
- Member-only areas: keep pages for logged-in users and point everyone else to log in or register, without setting up a full membership plugin.
- Staff portals and intranets: limit internal pages, documents and menus to certain roles or specific employees.
- Client portals: give each client pages that only their user accounts can open.
- Schools, training and course sites: show lessons and resources only to enrolled roles, with a clear message for everyone else.
- Nonprofits, associations and local government: keep board, volunteer or staff resources private on an otherwise public site.
- Campaigns and partner links: open landing pages only to visitors who arrive from your email, QR code or partner link, using a URL Parameter rule.
- Sites with logged-out-only pages: send logged-in users away from login, registration or signup pages with a friendly message.
Deadbolt controls who can view content. It does not take payments, sell memberships or create public-facing user profile pages. Access is based on standard WordPress roles and users, so it works with any plugin that assigns them.
Customizable templates
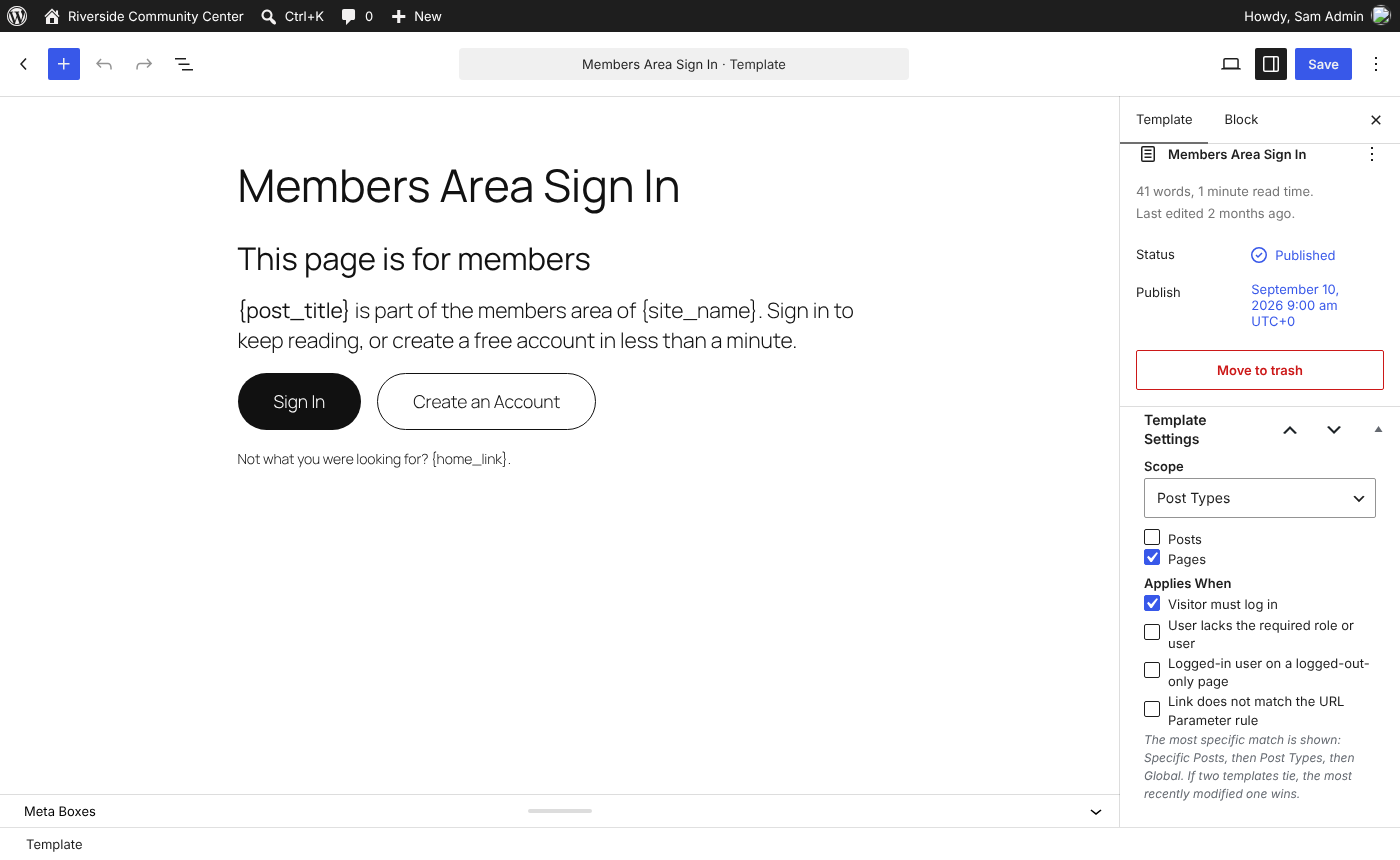
Templates are the heart of the plugin. Each one is a regular post you write in the block editor or the Classic Editor, with full formatting, images, buttons and columns.
- Write a template for each situation: the visitor needs to log in, the user lacks the required role or user access, a logged-in user opened a page meant for logged-out visitors, or the link does not match the page's URL Parameter rule.
- Choose where it applies: use a template everywhere, for certain post types, or for specific posts and pages.
- Templates for specific posts follow each post's Access setting: they show to whoever that post blocks, or you can limit them to certain situations.
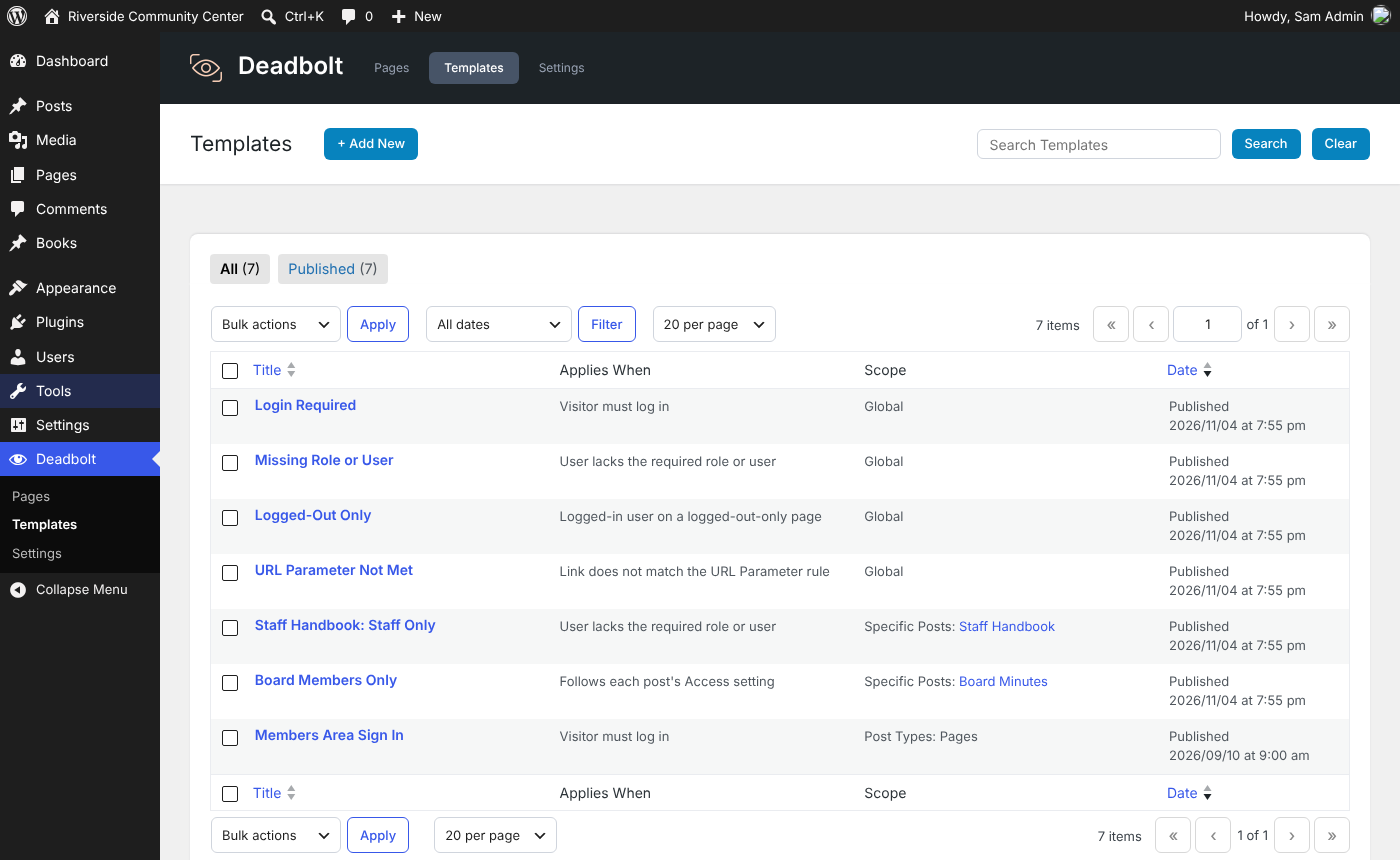
- The best match wins: a template for a specific post beats one for the post type, which beats a global one. If two tie, the most recently edited one is used.
- Merge tags: drop in login, logout, register, retry and homepage links or URLs, the title and URL of the restricted page, the roles that can view it, the visitor's name and the site name. Tags also work inside link and button URLs, and visitors return to the page they wanted after logging in.
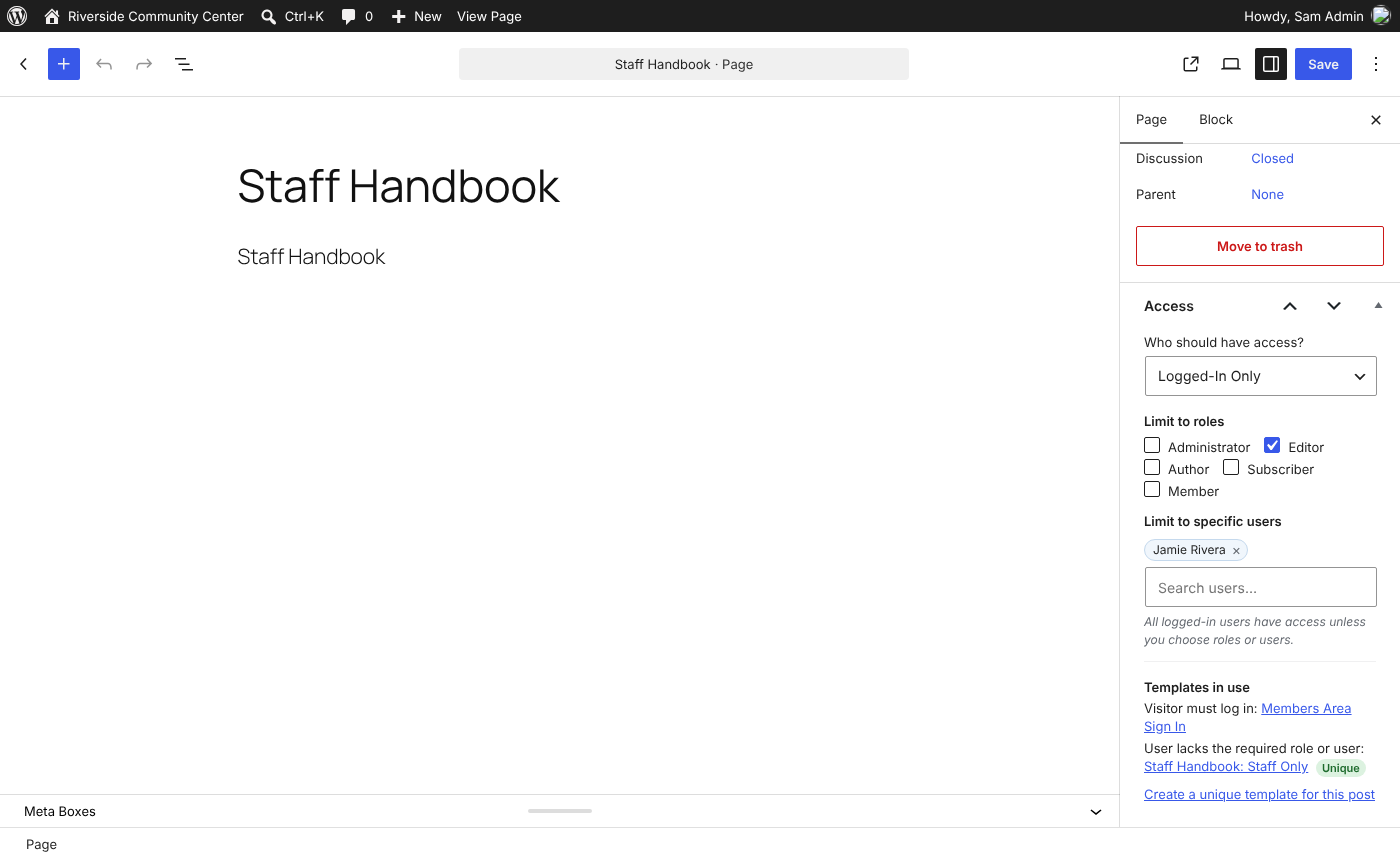
- See what visitors will see: the Access box lists the templates in use and updates as you change the access, before you save. Optionally list them in the post list's Access column too, with unique templates marked.
- Safe defaults: four ready-made templates are created for you, and a built-in message is used whenever no template matches.
An overview of everything restricted
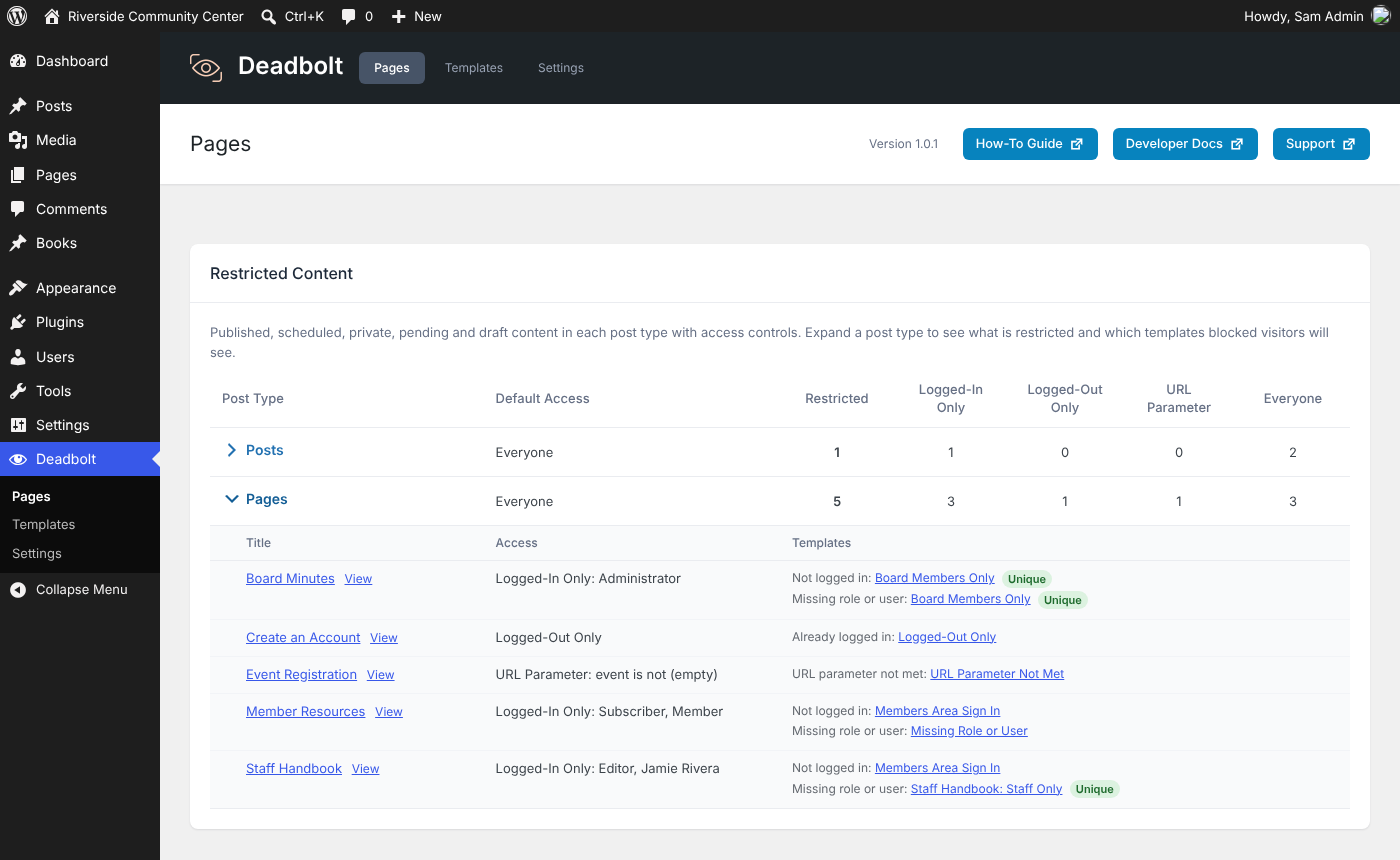
The Pages screen counts the restricted content in each post type, split into Logged-In Only, Logged-Out Only, URL Parameter and Everyone. Expand a post type to list its restricted posts, their access and the templates blocked visitors will see.
Flexible access rules
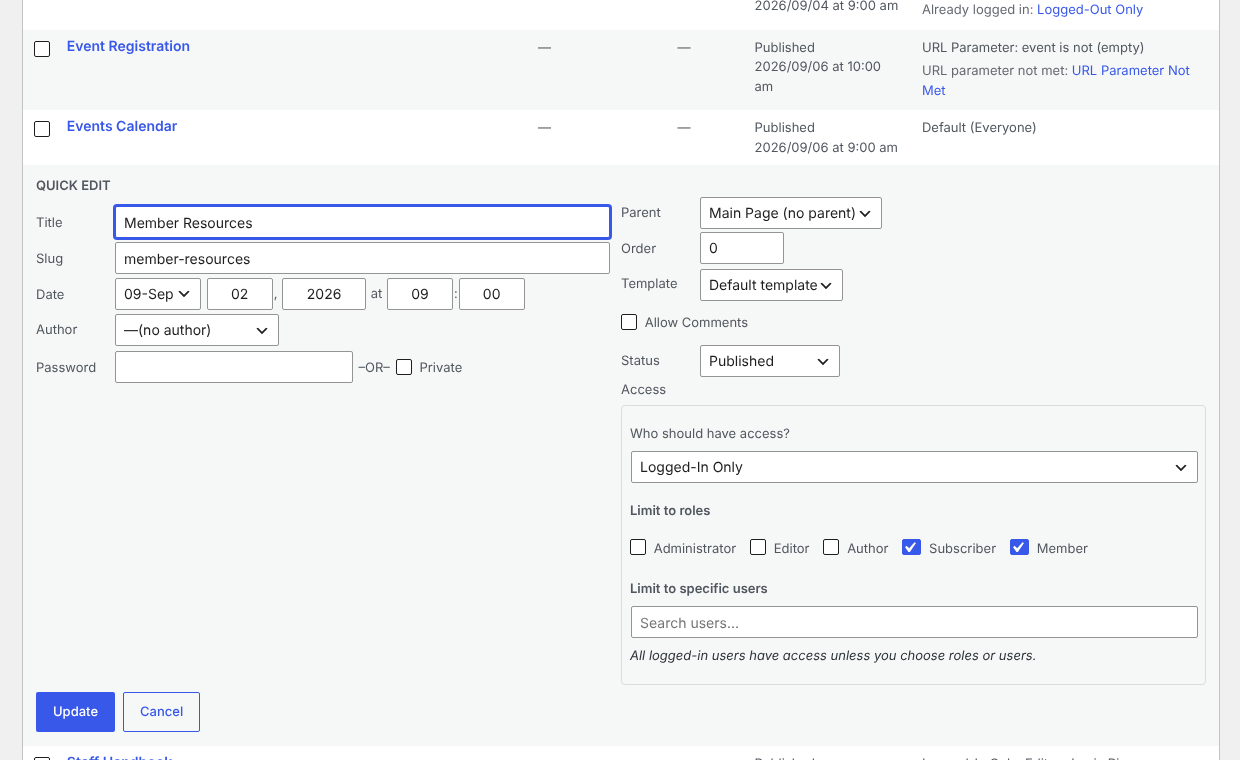
- Per post: Everyone, Logged-In Only, Logged-Out Only or URL Parameter, from a box on the edit screen, Quick Edit or Bulk Edit.
- By role or by user: limit "Logged-In Only" content to certain roles, to specific users, or to both.
- By URL parameter: let anyone view the content when the link they arrive with matches a rule: a parameter is, is not, contains, does not contain, starts with, ends with, is greater than or is less than a value. A missing parameter counts as empty, so "id is not" with no value only opens the page for links that carry an id.
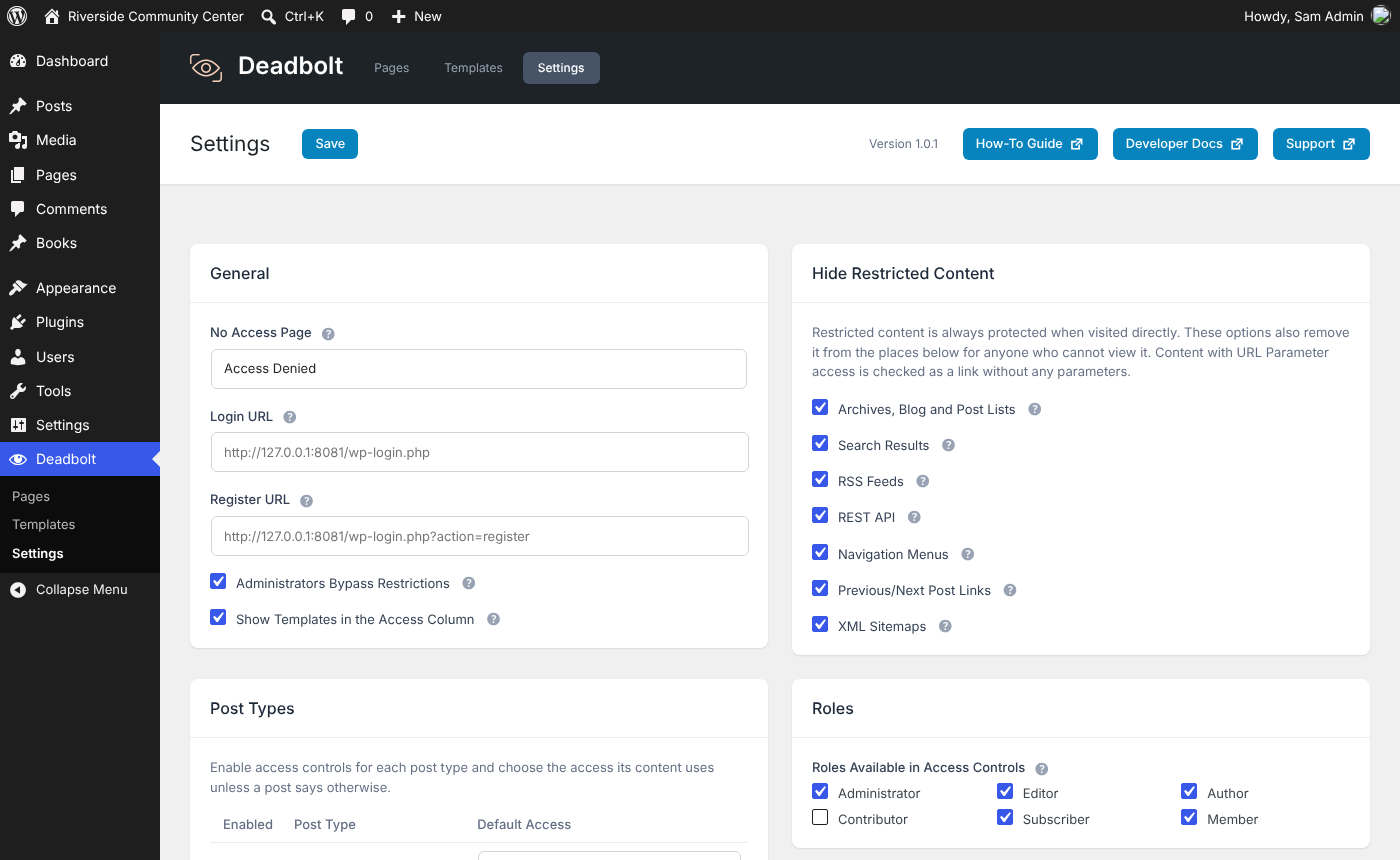
- Post type defaults: choose which post types have access controls and the access their content uses unless a post says otherwise.
- Administrator bypass: optionally let administrators view everything.
Hide restricted content everywhere
Restricted content is always protected when visited directly. You can also remove it, for anyone who cannot view it, from:
- Archives, the blog page and post lists, including Query Loop blocks and most page builder widgets
- Search results
- RSS feeds
- The REST API
- XML sitemaps from WordPress, Yoast SEO, Rank Math, All in One SEO and SEOPress
- Previous and next post links
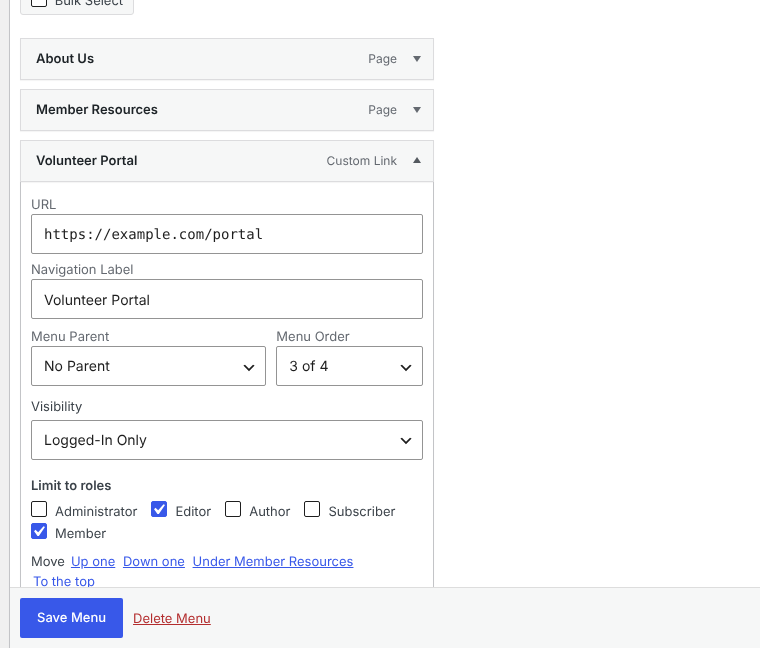
- Navigation menus, in Appearance > Menus and in the Navigation block, where items linking to content can simply match that content's access
Lightweight
- Access control without the extras: no payments, subscriptions, profiles or member directories to set up, maintain or slow your site down. Just who can view what, and what they see when they can't.
- Access rules are kept in one cached index, so hiding content adds no post meta joins to your queries.
- Scripts and styles only load on the screens that use them.
- No extra database tables, no external requests and no upsells.
For developers
Actions and filters are available on our developer docs.
More from PluginRx
See our other free plugins on WordPress.org or at pluginrx.com.
Demo
Screenshots
FAQ
Why can visitors still view restricted pages?
How does the plugin choose which template to show?
How does URL Parameter access work?
Can I show a different message on one page?
Which merge tags are available?
Will hiding restricted content work with my theme and plugins?
Is the hiding feature fast on large sites?
Does it work with caching plugins?
What happens to my data when I delete the plugin?
Where can I request features and get further support?
Installation
1. Install the plugin from Plugins > Add New, or upload the deadbolt folder to /wp-content/plugins/.
2. Activate the plugin through the Plugins screen.
3. Go to Deadbolt > Settings and select or create your No Access Page. It must contain the [deadbolt] shortcode - creating this page from Settings automatically adds the shortcode.
4. Under Post Types, enable the post types you want to control and choose their default access.
5. Edit a post or page and choose who can view it in the Access box.
6. Customize what blocked visitors see under Deadbolt > Templates.
7. Check everything that is restricted under Deadbolt > Pages.
8. ALWAYS test access to ensure it's working properly.
What Next?
How-To GuideDeveloper Docs1.0.1
- Initial release.